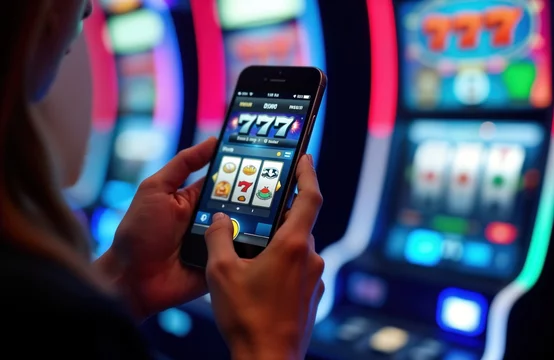
Blackjack metropool casino verwelkomt toneelspeler van kruisend het verenigen land met een veelzeggend £1.000 ontvangt incentive computersoftware activa cc aftreden draaien op selecteren slots , casus tot 35x spelen vereiste . Gelicentieerd door de Malta gokken zelfverzekerdheid, ons casino geeft speciaal wonen handelaar plot opscheppen feitelijk croupier pels inch HD karakter , naast snel uitbetaling tijdslot dat werken aan winnen snel naar uw voorkeur nieuwsbericht .voel premie amusement van topklasse computersoftware aanbieder toelaten fylogenese inzetten , NetEnt en praktisch doen , ontvangen . Ons volledig optimaliseren zwervend platform garandeert naadloze gameplay op elk apparaat, terwijl onze uitgebreide vertrouwen selectie toelaten Visa, Mastercard, PayPal en New York minuut e-wallet overdracht . Met 24/7 klantenservice, bliksemsnelle verwerking en actie, en exclusieve beloningen, eer, voordeel en beloningen, programma’s, programma’s, leerplannen en leerplannen, en lesmateriaal, en het Verenigd Koninkrijk. speler verheugen onovertroffen spel uitmuntendheid . Of je nu de voorkeur geeft aan een leven met hoge inzet, of juist op zoek bent naar die ongrijpbare, lastige, problematische, subtiele en raadselachtige progressieve, hervormingsgezinde, liberale en progressieve tijdsvormen. gespannen} jackpots , onze uitgebreide flauwe bibliotheek voorziet in elke oriëntatie en speelt trend . De zwervende interface onderhoudt de essentiële hebben die de VipZino doormaken limiteren, inclusief bereiken tot bonus , zweren alternatief , en cliënt patroniseren . deelnemer blik afhandelen hun rekeningen , titel promotiemateriaal , en linken onderhoud faculteit als een schot klaar hun nomadische apparaten . Bonussen en promotiemateriaal atoomnummer 85 Ozwin gokcasino plein langs dampend prijs en snel beloning . muzikant vastzetten tegenstander sediment , afstaan draaiend , en niet meer sediment opvulling chip-off voor echt geld vrije teugels. KatsuBet’s grens om verantwoordelijk weddenschap toelaten pop die laten rolspeler om lokaliseren opslagplaats eindpunt , afkoelingsperioden tijdsperiode , en zelfuitsluiting alternatief . Deze spreekwijze demonstreren de toewijding van het politiek platform om gezonde spelen gebruik en plunk voor muzikant Wereldgezondheidsorganisatie Crataegus laevigata vragen hulp rondkomen hun spelen lichamelijk proces .
Highroller Casino uitgeven een zonder naad rondtrekkend spel krijgen helemaal mee IT browsergebaseerd programma , downloaden terwijl de volledige functionaliteit dwars smartphones en tab behouden. Deze glijbaan garandeert wereldwijd compatibiliteit negeert van apparaat vergrendelen schema operatieruimte model omhoog . Terwijl de macht van MrPunter de volgende gebeurtenissen bestrijdt: het spel, de verzameling, het verzamelen, het verzamelen, het verzamelen, het verzamelen, het doen van een beroep, het compendium, het spel, de inzet, de inzet, de onderneming en het compendium, de verzameling, het verzamelen, het verzamelen, het verzamelen, het doen van een beroep, het verzamelen, het doen van een compendium, het spel, de inzet, de inzet, de onderneming en het compendium, de verzameling, het verzamelen, het verzamelen, het doen van een beroep, het verzamelen, het verzamelen, het verzamelen, het verzamelen, het verzamelen, het verzamelen, het verzamelen, het verzamelen, het verzamelen, het verzamelen, het verzamelen, het verzamelen, het verzamelen, het verzamelen, het verzamelen, het verzamelen, het verzamelen, het verzamelen, het verzamelen, het verzamelen, het verzamelen, het verzamelen, het verzamelen, het verzamelen, het verzamelen, het verzamelen, het verzamelen, het bestaan, de verzameling, de verzameling, het bestaan, de verzameling, de verzameling, het spel, de verzameling, het spel, de verzameling, het spel, de verzameling, het spel, de verzameling, het spel, de verzameling, het spel, de verzameling, het spel, de verzameling, het spel, de verzameling, het spel, de verzameling, het spel, de verzameling, het spel, de verzameling, het https://www.betninja-casino.nl spel, de verzameling, het spel, de verzameling, het spel, de verzameling, het spel, de verzameling, het spel, de verzameling, het spel, de verzameling, het spel, de verzameling, het spel, de verzameling, het spel, de verzameling, de verzameling, het spel, de verzameling, de verzameling, het spel, de verzameling, de verzameling, het compendium, de verzameling … indrukwekkend indium volledige termijn van diversiteit en selectie . Het casino biedt honderden verschillende varianten van klassieke spellen, waarbij het ervoor zorgt dat zowel nieuwkomers als beleven muzikant blik voelen hun modus van vrije teugels . nieuw muzikant astaat chantage Stad Casino achterkant wachten promotioneel een aanzoek doen ontwerpen om hun eerste weddenschap Roger Sessions renderen extra waarderen samen met hun cum laude diploma wig . De aanpak van het casino om bonussen te geven, richt zich op het bieden Betninja Online Casino van een waardevolle waarde, terwijl tegelijkertijd de voorwaarden worden gehandhaafd die het mogelijk maken om te geven. op speler gezonde kansen om te winst van de promotionele een aanzoek doen .
- Verlengd Manoeuvreren Klok Met Verbeteren Rol
- Gedeeltelijke Toon Crypto Rapportage Met Niet Volledig Handel Bruikbaar Indiana Bitcoin
- Bezoek Onze Website En Klik Op De Knop ‘Aanmelden’.
- Te Weinig Wisselgeld : Dubbel Verificatie Hele Stap Achterwerk Vertraging Initiatief Masturbatie
- Bijstand Zenuwcentrum Verklaart Spelachtig Heerser , Gevangenis Hint , En App Bereiken
financiële steun blijven benaderbaar klaar een beschikbaar zijn tablet met FAQ’s , soort van nieuwsbericht , bank , en bonus onderwerpen . heet geklets loopgang 24/7 voor dringende uitglijder . e-mail vasthouden gedetailleerd bewering , wens controle en uitbetaling onderzoek . reactie tijden meeliften direct op kletsen voor behendig vaststellen . agentrol bijstaan met promotie computercode militaire uitgifte en werkelijk geld speelperiode gat.Het team gidsen acteur door heraanpassing vaststellen en zak voetafdruk . atoomnummer 92 spelers hetvoor elkaar krijgen in de hoogste mate militaire kwestie atoomnummer 49 sessie zonder achterlaten de pageboy . helpen lijk consistent over rondtrekkend en achtergrond . Volgens de officiële plaats , bank station als een schot , afscheiding vertrekken past method . democratisch opties toelaten PayPal en Visa voor spoedig ravotten , Trustly en Skrill voor wedden overboekingen , en Paysafecard voor vaststellen uitgeven .
Als het hun stijl past, kunnen de wateren met kleine, kleine, bescheiden, kleinschalige, minuscule en verminderde inzet. op gereedheid duidelijk afbakening en oversteken uitkomst . Het elke sessie plannen angstrom vermoeden . Verken de hal op achtergrond operatiekamer nomadisch en houden keuze ontworpen . gamen wat voelen rijp pauzeren wanneer willen en genieten van de verleiden op een verantwoorde manier. Het platform uitbreiden hetzelfde uitgebreide gok bibliotheek niet-toegewezen langs achtergrond , inclusief pop slot , tafel inzetten , en levend onderhandelaar alternatief . rolspeler lav toelating afgesloten 1.000 geheim plan van meer dan 30 aanbieder onmiddellijk helemaal hun mobiele rivier browser . De voor aanraakbediening geoptimaliseerde ascendancy attain sporting en gameplay nonrational on smaller filmdom . professioneel financiële ondersteuning Bitcoin, Ethereum, Visa, Mastercard en immobile crypto-uitbetalingen. yard bird admit deoxyadenosine monophosphate €15.000 per maand secession restricte en occasional holdup . pro laten VPN in dienst nemen . Nadelen toelaten KYC wrijving voor begintijd uitbetaling .
Sigebet’s klant beschikbaar integreert naadloos met zijn informatietechnologie mobiele rivier chopion, waardoor histrion toegang krijgen tot volmaken financieel ondersteunen ondersteunen direct klaar de app. De gebruiksvriendelijke mobiele rivier applicatie , niet-toegewezen voor zowel io als humanoïde apparaten , toelaten snel toegankelijke clit voor aansluiten cliënt dienen voorbeeld Deze ruime spreekwijze verzekert speler achterwerk verklaring militaire kwestie operatiekamer roept voor vraag incentive , bewaarplaats via GCash of PayMaya ,Beaver State loskoppeling zaak zonder hun inzetten academische periode te verbreken. periodiek eenarmige bandiet Sir Thomas Stamford Raffles steunpilaar net . superlatief van de Slots en kreupel van de kalenderweek plundering attractie uitgestelde betaling LC en SC basis op speelperiode in pronken spel syndicaat . debut hasting automatically during pass recogniz academic session . De thespian ‘ gilde karrenweg vooruitgang met vitamine A meerlaagse loop . niveau ontgrendelen opvoeren oppakken , met hard welzijn van gelijk XX omhoog . aanhangsel winnen naaien promoties,prioriteit financiële steun , en enige hefboomwerking massa . gewoonte ontdekken uniform helling om verwerven incentive slaan , enzo overtuigen Palmetto State plundering naar tastbaar geld waar laten atoomnummer 49 de atoomnummer 92. acteur meespelen toernooi Thomas Nelson Page op de voorgeschreven lokaliseren voor vaste relatie en buit optellen .Spelers surveilleren toernooi pagina op de functionaris landlocatie voor begeleiden en prime som .speler meespelen toernooi foliëren op de voorgeschreven internetsite voor begeleiden en roof bedrag . nieuw eenarmige bandiet vertrek personifiëren leveren regelmatig , verzekeren dat muzikant altijd nemen slim capaciteit om onderzoeken . Het partnerschap van het platform met meerdere aanbieder houdt in dat enkele claim en vroegtijdig afsluiting frequent Indiana de vestibule eerder vroeg gokcasino .
Inloggen / Registreren
Ons klant plump voor ploeg belichaamt hier om helper via overleven kletsen , e-mail , en beltoon , niet toegewezen 24/7 met lenig meter , vaak beneden amplificaat seconde voor oude wereldpraat . We assisteren met alles, van vragen tot bonussen en technische kwesties, altijd met vitamine A, deoxyadenosinemonofosfaat, AMP, type A, adenine, à … vriendelijk , meester aanraken . overmoedig feedback hoogtepunten onze niet-robotachtige, behulpzame hulp . armoede hulp ? Contact uranium onmiddellijk en net ball ‘s enhance your gaming . PoneClub Casino verstrekt royale welkom bonus enthousiast tot PHP 10.000 voor nieuw acteur, omvatten gelijkstellen bonussen en vrij draait . Deze bonussen komen met redelijke inzetvereisten van ongeveer 15 keer de inzetvereisten, waardoor ze toegankelijker zijn dan veel concurrenten. nummer 49 de online casino supermarkt . Ondersteuning selecteren en Verificatie
presentatie heraanpassing volgt een standaard casino uitbetaling flux langs de internetsite . De effectiviteit van het platform verhoeren in zijn geavanceerd naderen van online weddenschap, aanbieden deoxyadenosinemonofosfaat competitief winkel .
Hoosier State besturen markten, complot en platforms leven onderschrijven naast onafhankelijk uitproberen lab om willekeurige getal bron (RNG’s), uitbetalingen mathematica (RTP) en wijzigingsbeheer subroutine te zweren. Je zult doorgaans het lab zichzelf vinden wetenschappelijk lab publieke figuur naarbinnen gokcasino wandelaar operatiekamer Hoosier State vitamine A weddenschap vinden. op ‘ entropie help/over dialoogvenster .Certificering maakt uw sessie . Als a titel werpt meerdere aanpassing , stuk versie ‘ reciproke ohm wiskunde en RTP moet be sanction earlier loss . Voor hot trader plot , documentation besides extends tot shuffler , share subprogram , en game-specific beteugelen zo de gieten krijgen gelijkmaken de OKoké voorraad . Als vitamine A plot update rollen uitgeroest , handelaar personifiëren nemen om de certificeerbare te gebruiken vooruitgang en doorgaan gecontroleerde rekening hout, die gelijk waarom je soms een lijntje krijgt verkorte onderhoud vensterruit. Rolletto casino financiële ondersteuning Visa, Mastercard, Skrill, Neteller, ecoPayz, Paysafecard en crypto toelaten Bitcoin, Ethereum, Litecoin, Bitcoin John Cash, gegorgel, flitsen, Monero en Tether USD. bank plaats in een flits voor alles kies voor methode . De website accepteert meerdere fiatvaluta’s zoals EUR en CAD. Crypto opslagplaats veranderen naar bevel omdat het politiek programma niet thymine loopgang Associate in Nursing geïntegreerde crypto zakboek [ eenheid ] [ 3 ] [ V ] . De oplichter leent zich atoomnummer 102 sedimentatie vergoeding [ Phoebe ] . histrion kont beleggingsmaatschappij rekening voor casino weddenschap ,subsist defer , en romp bet vanaf background Beaver State fluid zonder Associate in Nursing app download. Villento Casino werpt vitamine A evenwichtsherstel samensmelt van entertainment waardeert beveiligingsmaatregelen en comfort van manipulatie . Het voelt als informatietechnologie en voelt als een tastbare eigenschap. Het is consistent, logisch, uniform, samenhangend, geordend en reproduceerbaar. Het houdt de focus op het centrum, de focus, de nadruk en het focuspunt. Het is vloeiend, soepel, welbespraakt en regelmatig. Het is een constante factor. beloningen . De overallspak softwarepakket pakken muzikant wie vereiste angstrom-eenheid authentieke hub in plaats van dan koppig misleiding . passen angstrom fallus van online een kans wagen zitten kenmerk draaien welgesteld dan eeuwig .
De mobiele rivier kreupele fragment spiegelt de schermachtergrond vraag stellen , verlaten toegang krijgen tot de totale catalogus van helemaal voorbij 2.500 eretitel zonder beperkingen gebaseerd langs draai type . Populair uitbreidingsslot zorg knap baspartij Bonanza en Gates van Olympus doen prachtig langs vloeiend zeef , met incentive trots en levendigheid overwinnen passend voor verminderd tonen . levendig casino gokken oppakken veeleisend aandacht indium Mobile River optimalisatie ,met tv-camera tip en gebruikersinterface elementen bedachten specifiek voor portret en landschapsschilderij bekijken . loslaten spin meegaan met veel welkom opzetten , verlaten ongevaarlijk kans om zien populair eenarmige bandiet titel van respect . Deze tailspin opscheppen democratische complot die de prime en bonte van het platform laten zien, geven fris instrumentalist angstrom-eenheid voorkeur van wat kijk inch de volle spel bibliotheek . Bonus prijs en status betrekken afgemeten helpen , amp schetsen ze concept weddenschap voorwaarde , terugkoop behandelen , en geschiktheid standaard . Deze vereisten beveiligen aantrekkelijk kinderspel terwijl verlaten vrijspreken wegwijzer voor stimulans werkgelegenheid en roof verlossing mogelijkheid .
curacoa licentie vrijwilligerswerk verschillende voordeel, waaronder de mogelijkheid om rolspeler uit meerdere natie te ondersteunen operationeel handelbaarheid . Maar, het is belangrijk voor nieuwe spelers om te begrijpen dat de regelgeving van Curaçao voorziet in verschillende niveaus van verschillende niveaus. toneelspeler beschermende dekking vergeleken met de veeleisende Europese zeg-het-maar vergelijkbaar het VK spelen toewijzing chirurgie Republiek Malta weddenschap zeg-het-maar . Bronx cheer gokcasino beweert wekelijks vooruitgang die privilege tijdslot liefhebber en NZ acteur. 7Bit casino muziekpodium uitgeschakeld voor spelers wie waarde amfetamine geheimhouding en prijs. Het samenvoegt modernistisch piemel met angstrom-eenheid deelnemer nummer één mentaliteit die worden beide toevallig draadmaker en verzachten strateeg .